Thursday, November 15, 2012

Sweet Potato Bacon Biscuits!

Happy Friday-eve! This is my 4th post in a row this week, whoa. I went from being MIA to bombarding you with all kinds of Thanksgiving goodness. Thanksgiving is just 1 short week away though! It is time to get that menu plan locked and loaded. So why should these biscuits make your Thanksgiving menu? Well first (and most importantly) they're freaking delicious. Second, they have bacon in them. Do I really need a third? I said bacon. But if you really need a third, it's a different, unexpected way to do sweet potatoes. I know I talk about (and cook) sweet potatoes ALL THE TIME, and that's mostly because I just love them but they're also nutritional powerhouses! Super good stuff yo. So eat your sweet potatoes. Like this. Or like any of the other tons of ways I've mentioned on this blog.
This is a Paleo OMG recipe (PaleOMG.com, she's hilarious & makes amazing food!) and the MINUTE it arrived in my in-box I knew I would be making them. They combine my hubby's 2 favorite things, sweet potatoes & bacon. Sounds like a weird combo, tastes delicious. TRUST ME. I added a little cheese and that was a great addition but they would be fab without as well. Just as great with breakfast as dinner too. These little guys are versatile! Check out Juli's original recipe here: http://paleomg.com/thanksgiving-side-dish-bacon-chive-sweet-potato-biscuits/

Ingredients: 
2 sweet potatoes, cooked & peeled (I just zapped mine in the microwave for 10 min)
3 Tablespoons coconut flour (I would think any kind of flour would work though...)
3 eggs, whisked
8 strips of bacon, cooked & crumbled
leftover bacon fat from cooked bacon
4 Tablespoons chopped green onions
1 teaspoon baking powder
1 teaspoon garlic powder
salt & pepper to taste
(optional) 1/4 cup shredded cheese

Step 1: Pre-heat oven to 375 degrees Fahrenheit. Grease a baking sheet. Mash your cooked & peeled sweet potatoes in a bowl (I just used a fork, mine were super soft).
Step 2: Add flour and stir to combine.
Step 3: Add eggs and stir to combine.
Step 4: Add bacon, bacon fat, green onions, baking powder, garlic powder, salt & pepper, and cheese (if desired) and stir to combine.
Step 5: Drop biscuits by rounded spoonfuls onto your baking sheet. Bake for 25-30 minutes, or until golden brown on top and cooked through.
 
ENJOY :-)
 

Wednesday, November 14, 2012

Easy Mashed Cauliflower!

I am super excited to share this recipe with you today, mainly because it is pretty much the easiest recipe of all time. I used frozen cauliflower so there isn't even any veggie chopping involved. Just boil the veggies, drain, mash, add butter/garlic/cheese/etc, EAT. The whole process took me maybe 10 minutes. That's it. I knew I wanted to have mashed cauliflower in the place of mashed potatoes for our "Fakesgiving" feast but I knew that would be a hard sell to my mashed potato loving friends. So I did what any good friend would do- I lied. I told them that the mashed cauliflower was in fact mashed potatoes. I didn't tell them the truth until the bowl was scraped clean. Is it so wrong that I wanted my friends to get all the benefits of healthy cauliflower? Nope, and when I told them they were a little shocked. I say a little, because they read my blog and they know I'm trying to keep everything healthy so they were expecting trickery, but they still enjoyed every bite. My friend Ashley told me that she suspected that cauliflower was added to the "mashed potatoes" but she never would have guessed that it was straight up cauliflower only, no potatoes at all. I definitely recommend you also try the little white mashed potato/ cauliflower lie on your family :) 
And you're going to have to forgive me for lack of pictures on this post, I did have 5 different recipes going on in the kitchen at the same time and it seems the photographing of the EASIEST one fell through the cracks. Of course. I'll do my best to give really good descriptions :)

Ingredients: (Served 6)
2 (16 oz.) bags frozen cauliflower florets
1/2 stick unsalted grassfed butter
2 garlic cloves, minced
1 teaspoon seasoned salt
1 teaspoon freshly ground black pepper
(optional) 1/4 good quality shredded cheese

Step 1: Put your frozen cauliflower in a pot and add enough water to cover all the veggies completely.
Step 2: Put the pot on a burner on high heat and bring water to a boil, then decrease heat to medium high and let cook for about 5 minutes or until florets are fork tender.
Step 3: Drain cauliflower. Add the florets to a bowl for mashing, or a food processor, or like me a high quality blender!
Step 4: Process cauliflower until smooth (or mash until smooth). Add butter, garlic, seasonings, and cheese, process until all combined. SERVE! :)
 

Tuesday, November 13, 2012

Roasted Butternut Squash!

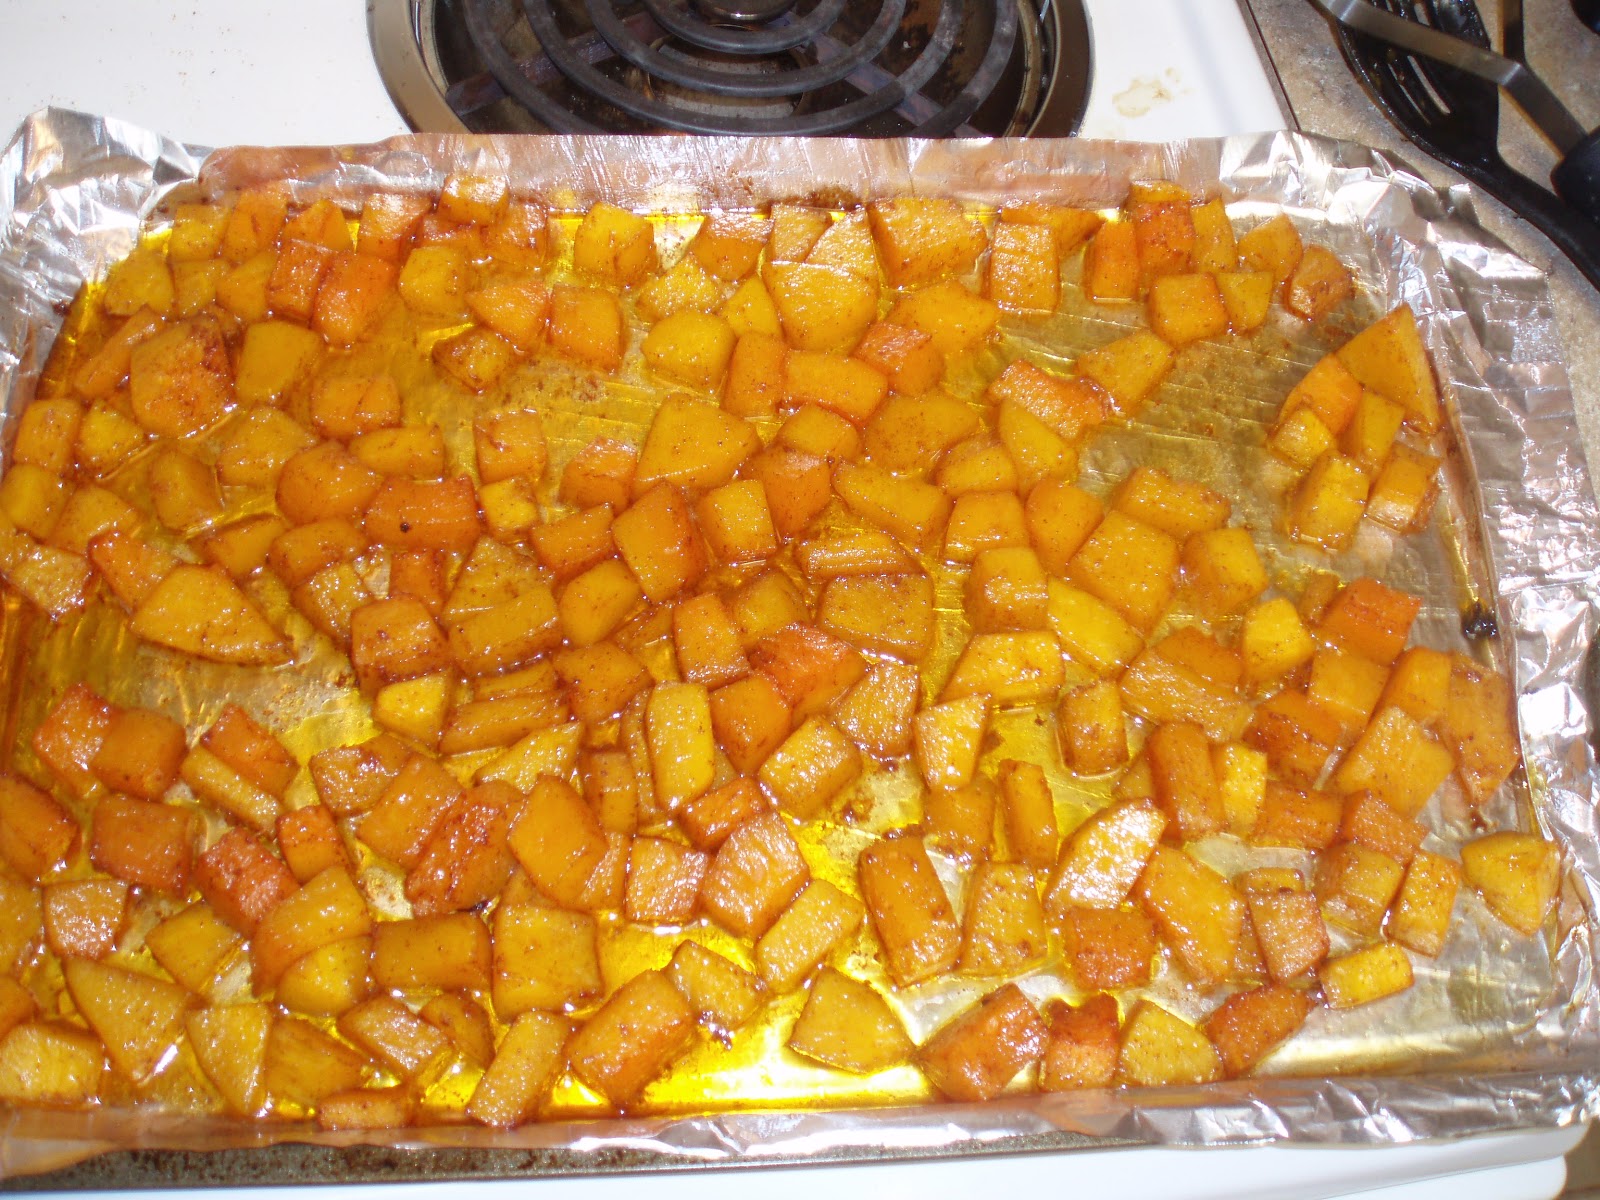
Today is day 2 of Thanksgiving recipes! Wahoo! And today's recipe happens to be my very favorite one that I am sharing all week. Just by a lil bit though, they're all really good ;). Have you ever made butternut squash before? I had not, until I made this one. I was always super intimidated by the thought of peeling and chopping a squash. It really wasn't that bad, it did take some elbow grease but I figured if I was about to stuff myself with turkey and fixins' a little cardio during the prep was kinda a bonus. I had eaten butternut squash previously, but never prepared it myself so I knew that flavor I was dealing with and I wanted to use pretty much the same spices that I use in my Sweet & Spicy Sweet Potato Wedges and just sub 100% maple syrup for the brown sugar to keep it paleo-ish. The flavorings were SPOT ON. I could have eaten an entire plate of this squash, but when I went back for seconds they were GONE. My friends who I was feeding that night are not particularly fond of vegetables either, and they inhaled these. They would make a perfect side dish for your Thanksgiving feast, they're more elegant than sweet potatoes topped with chemical-laden marshmallows and you'll be secretly sneaking in a bunch of Vitamin A and nutrients into your guests ;) Win- win!
I figured some of y'all may be scared of squash chopping like I was, so I took step-by-step pictures so I could show you how easy it was! You just need a good, sharp knife and a vegetable peeler! PS: you MAY be able to find fresh, pre-chopped butternut squash at your local grocery store- I saw some @ Whole Foods the other day and considered buying it but I felt like that was cheating and it was $10 for just over a pound. My squash was $1.30 at the commissary and I feel like the chopping effort was worth me saving $8.70. You may be able to find some pre-chopped squash that is worth the price though!

Ingredients:
1 Butternut Squash
Enough olive oil to coat completely, I used about 2 Tablespoons
1/4 Cup 100% Maple Syrup
2 teaspoons Chili Powder
1 teaspoon Paprika
1 teaspoon Pumpkin Pie Spice
1/2 teaspoon Salt
1/4 teaspoon Cayenne Pepper

Step 1: Pre-heat oven to 375 degrees Fahrenheit. Line a baking sheet with aluminum foil. Take your butternut squash out and prepare to chop.
My Gourd.
Step 2: Chop the ends off of the squash, about an inch from the top and an inch from the bottom.
Step 3: Using a vegetable peeler, peel off the hard outer skin revealing the dark orange flesh underneath.
Step 4: Slice your squash in half, lengthwise (or "hot dog style" as we called it in kindergarten...)
Step 5: Using a spoon or melon baller scoop out the seeds and stringy flesh from the centers.
Step 6: Now you're done with the squash prep (It wasn't THAT bad was it?!) just dice those babies up and throw the wedges into a bowl for seasonings.
Step 7: Toss with wedges with olive oil and maple syrup, making sure they are all completely coated!
Step 8: Add all seasonings and stir to coat.
Step 9: Spread in an even layer on your lined baking sheet and bake for 20-25 minutes or until "fork tender" (stick your fork in, they're soft-ish- like when you know your potatoes are ready to mash)
ENJOY! And don't forget to hoard some for yourself, they go fast! :-)


Monday, November 12, 2012

Classic Roasted Thanksgiving Turkey!

Happy Monday everyone! I hope those of you who have today off are enjoying it, and those of you who have work/ school are thankful for those on- going opportunities! :-) I have known for sometime that I wanted to share Thanksgiving recipes on the blog, and it occurred to me last week that I would need to do that sooner rather than later- posting recipes I cooked ON Thanksgiving wouldn't really do y'all any good. Unless you wanted to use them next Thanksgiving. :-) So I did the only normal thing and cooked a full Thanksgiving dinner yesterday, November 10. I invited some of my best friends to taste test and we dubbed it "Fakesgiving". It actually worked out really well because my husband and I will be in Chicago with his family for the holiday this year and we will miss our big feast with our friends that we've enjoyed for the past 4 years. I have hosted Thanksgiving dinner at my home every year since we've been married, since 2008, and while I've LOVED each and every one of those holidays I would be a liar if I told you I wasn't excited to have someone else hosting this year. It's a lot of pressure cooking the bird and making sure you have enough silverware for all of your guests! Maybe we're the only ones with an ongoing silverware shortage? I always invite EVERYONE, I hate the thought of any young airman on our base without a Thanksgiving feast to go to. Typically I would cook all of the Thanksgiving staples: Turkey, mashed potatoes, gravy, cranberry sauce, rolls, stuffing, sweet potato casserole, pies, etc. etc. But THIS year I wanted to create a menu of healthier options, still invoking all of the classic flavors of Turkey Day but where you don't feel like you need to enter a food coma and die afterwards. I understand to most people, even those of you who are consistently eating super healthy, Thanksgiving is a day to over- indulge on EVERYTHING. And I get that, you shouldn't deprive yourself if those are things you really want. But I will say this- after feasting yesterday on my healthified menu I felt great afterwards. Not like I needed to un-button my pants and take a nap. I liked that feeling. :)
Today is the first day of recipes and it is the easiest one of all. The turkey. Some people are intimidated by the thought of cooking a turkey, but that's really silly. Just keep the little guy moist and seasoned and you'll have a delicious bird in no time. The full menu yesterday (which will be appearing recipe by recipe this week) was Turkey, roasted butternut squash (my FAVORITE!), sweet potato bacon biscuits, mashed cauliflower, and a crustless pumpkin pie! I hope you will come back and check out all of the recipes, and I hope everyone has the very best Thanksgiving ever this year :)!

Ingredients: 
1 Turkey, thawed. Mine was a 10 lb bird!
Enough olive oil to coat the entire turkey, I used about 4 Tablespoons
3 Tablespoons minced garlic
2 Teaspoons freshly ground black pepper
3 Tablespoons Seasoned Salt

Step 1: Pre-heat oven to 375 degrees Fahrenheit. Remove the giblets and other extra bits from the cavity of your turkey. Put the bird in a dish large enough to hold your bird.
My turkey!
Step 2: Pour olive oil over the entire turkey breast and into the cavity as well. Use your hands to massage the oil into the skin and cavity. I know, it's gross. Just do it, it only takes a couple minutes and you're done and it's worth it!
Step 3: Take your minced garlic and massage it into the cavity and under the skin of your turkey. You don't want it on the actual skin because it will burn, putting it under the skin and into the cavity will bring the flavors out into the breast.
Once again, pretty gross- but it doesn't take long. Just get it over with!
Step 4: Season the skin and the inside of the cavity with the black pepper and seasoned salt. 
Step 5: Cover the dish and the turkey with aluminum foil, completely. For a 10 lb turkey you will need to bake it for about 3 hours, cook with the aluminum foil on for the first 2 hours and then remove for the last hour to let the skin brown.
Step 6: Use a meat thermometer inserted into the thigh to make sure the turkey is fully cooked, it should be at least 165 degrees Fahrenheit. Once fully cooked pull the turkey out of the oven and let it rest for 10 minutes before carving. 
 Carve the beast & enjoy!


Thursday, November 8, 2012

Meatzas!

Happy Friday-eve! :-) I hope everyone is having a really good week! It's a been a big week for our country, you know with elections and all. Don't worry, I'm not going to get all political on you here A) because I'm not a political person and B) this is a cooking blog, I'm quite sure you didn't come here for politics, nor do you care about my personal opinion on the subject. I will say this, because I think it's something everyone needs to think about every once in awhile, especially when everybody's all heated about this candidate or that guy: Voting is a super thing, it's so beautiful that we as people in this country have the opportunity to choose the people who represent us in the government. However, while they are representing us in grand- ole D.C. it doesn't mean that you're completely helpless! We can ALL do little things to help our country out every single day. Say wha? Little 'ol me can make a difference? Of course you can! Instead of hitting Panera for lunch (I know their broccoli cheddar soup is good, just skip it one day!) try a local diner- the food is likely cheaper and you can feel good knowing that the money you spent is being pumped back into your local economy! Hit a farmer's market Saturday morning with the fam, it's a super fun experience, you'll get WAY better deals than at your local grocery store, the food is quite literally "farm- FRESH!", and you're helping out your local farmers! Anytime you're at the grocery store and you have an option between Florida grown oranges or some grown in Mexico, always choose the home-grown guys! I will NEVER understand why we need to fly produce in from other countries when we grow so many goodies right here in the U S of A! And last, but certainly not least, anytime you see a service man or woman walk up to them and thank them for their service and their family's sacrifice. This costs nothing, and you have no idea how much it means hearing those very simple words! Everytime someone says this to my husband and I my heart grows 3x like the Grinch on Christmas Eve, it's just such a beautiful gesture. Does it boost the local economy? Maybe not, but boosting our military's morale is ALWAYS a good idea. :-) Okay kids, I'll step off my soapbox now. I said this was about the meatzas. What the heck is a meatza? Let's talk...
I saw a picture on Instagram the other day of someone who had used an eggplant slice for a pizza base, instead of using a flour-based crust. I thought it was so brilliant! Then I thought about it some more, and I decided that if I could use a piece of meat they'd be like little protein pizzas. I love sausage pizza, why not use sausage as the base? Wham bam thank you ma'am the Meatza idea was born. Basically it's just a sausage patty, topped with tomato sauce (I used Muir Glen- it's organic and honestly just the best tasting sauce you can buy), fresh mozzarella cheese (or skip if you don't do dairy), and your choice of pizza toppings. They were fun to make and fun to eat! I just set all the ingredients out so everyone could make their own little meatzas, then we baked them in the oven long enough to let the cheese melt and chowed down. THEY WERE SO GOOD. Who needs pizza crust when you have sausage? Not me. Although I will be in Chicago in about a week and half and you really can't fault me if I eat a traditional pizza there. Chicago pizza is ridiculously divine. But on a normal daily basis, I'll take a meatza ;) For toppings we had mini pepperonis, some diced green peppers, and some pico de gallo (onions, jalapenos, tomatoes). Other toppings that I think would be phenomenal: anchovies, bacon (pig on pig? why not.), mushrooms, olives, onions, sun-dried tomatoes, basil, pineapple, etc. etc. Really just whatever you & your family usually like on your pizza works great here. If you're not a sausage fan, why not use a ground beef patty, or ground chicken or ground turkey for that matter! 

Ingredients: (This fed 4 grown people!)
16 cooked sausage patties
Choice of tomato sauce
Fresh mozzarella, cut into small slices
Choice of pizza toppings (we used pico de gallo, peppers, & pepperoni!)
Step 1: Pre-heat oven to 350 degrees Fahrenheit. Set out a little station for your meatza making. Top sausage patty with tomato sauce.
Step 2: Top with mozzarella and choice of pizza toppings.
Step 3: Line 'em up on a baking sheet and bake in pre-heated oven for about 15 minutes or until your cheese is good and melty.
ENJOY!
 

Tuesday, November 6, 2012

Slow Cooker Applesauce!

Guess who's back? Back again? Brittany's back, tell a friend. Okay, sorry I'm no Eminem- but the point is I'm back to blogging! The past couple of weeks have been totally cray cray for me because I was moving my little caravan from Florida to Arkansas to wait for my hubby to come home from his 6 1/2 month deployment to the Middle East. Pretty much all of last week I was just running errands and setting things up for him to have some-what of a stable "home" to come back to. I say "home" in quotations, because we are currently residing in our very generous friends house while we are in limbo until we move to our new base next month. I told you- cray cray! But it's all good now, because my husband arrived back in my arms last Saturday morning! Wahoo! So all is right in my world, I have been cooking up a storm- but most of the meals I've made him thus far are already on the blog! Back to me thinking up new ideas, at least I have a very good recipe tester now! :) Okay, I lured you here with promises of applesauce...
Have you ever made homemade applesauce before? If you answered no, that is a real shame! It is CRAZY easy and the end result is a much healthier applesauce than what you get in those little jars at the grocery store! Bonus, it is apple season and you can get all kinds of apples for super cheap right now. Depending on what kind of apples you get, it will change the taste of your sauce. Like if you were to use some sour-ish granny smith apples, you'd have a more tart applesauce. Use super-sweet Gala & Courtland apples, like I did here, and you'll get a more traditional sweet applesauce! Apples are naturally sweet, so you don't need to add much sweetener, if any. I chose to add a couple of teaspoons of agave nectar. You could sub the agave for honey or for a bit of brown sugar- or you can skip the sweetener all together and have just an unsweetened applesauce. Bottle some of your fresh sauce up and give it to neighbors as gifts! There is nothing better than some fresh homemade goodies, especially when they're secretly healthy ones ;) The kiddos are always applesauce fans (at least all the ones I know...) and this is a recipe you can feed them and feel really good about! Plus... it makes your house smell heavenly while it's cooking! That perfect fall, cinnamon-y fragrance! YUM!

Ingredients:

6 apples of your choosing (I used 3 Courtland, 3 Gala) peeled and cut into wedges
1 Cinnamon Stick (you can buy just 1 in the bulk section @ Whole Foods;))
3 teaspoons Agave Nectar (or honey, or brown sugar)

Step 1: Peel & cut up your apples. Dump them into the slow cooker. Top with agave and toss in the cinnamon stick. Cover and cook on low for 6 hours. Stir every couple of hours.
Step 2: Fish out your cinnamon stick. If you like chunky applesauce- you're done! For a smoother texture mash with an old fashioned potato masher, or use one of those fancy schmancy immersion blenders if you have one! If you have super picky kids who need their applesauce SMOOTH, toss it into a food processor or blender and give it a whirl. 


THAT'S IT. Told you, easiest recipe ever! Keep in an air-tight container in the refrigerator :) ENJOY!
And a little pic of me & the hubbs the day he came home... :)